When I bought my copy of the new HOF Fire Team rules, I picked up all three of 15mm.Co.Uk's official tile sets. Very glad I bought these! The quality is excellent - very detailed artwork printed on uncut glossy photo stock. The actual battle boards give you a nice variety for your HOF-FT games, and you get a ton of assorted street and room furniture, buildings, junk piles, barricades, and other goodies. I've played around with quite a few paper terrain items (free and commercial) in the past, but none that have looked so good "in the flesh". When you see this in person, you want to play a game on these!
I wanted to make sure these would stand up to the rigors of my rather ogrish gaming and storage habits. If you're careful with your toys, the paper used for these tiles would last quite a long time on its own. But mounting them onto a harder stock seemed like a wise decision for someone like me. It was a simple and quick project, but well worth the time and effort.
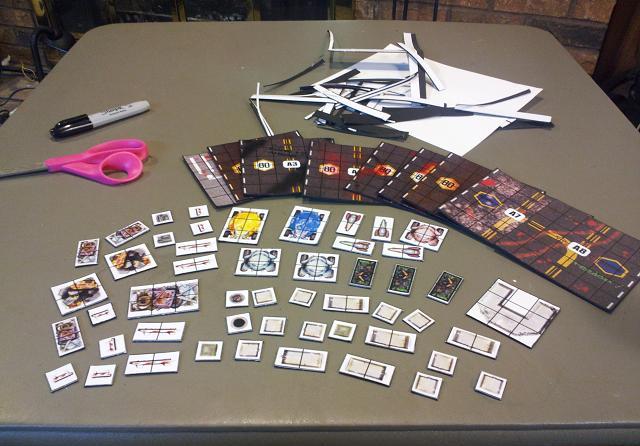
Here's the raw materials for my little project:

- The HOFFT Tile Sets (obviously!)
- Spray Adhesive (or you could use glue sticks, if you don't have a proper location for using aerosols)
- Posterboard, mounting board, foamcore, or whatever else you're using for backing. I found a very rigid sheet of mounting board at a local Hobby Lobby - 28" x 44" for about $12.
- And, of course, a big scrap of cardboard... don't want adhesive residue all over my patio.

The process is pretty simple from here. Just hit the back of the tiles with the adhesive, let them sit for a few minutes, and slap them onto the board.
The six sheets in each pack fit perfectly across the short edges of my mounting board. I wasn't sure it would work out this way, but all three tile sets fit on the single board - with room to spare.

I let the adhesive dry for a few minutes in the warm sun, then took the project back indoors. Then it was a matter of digging out my high-tech, expensive, and hard-to-use special cutting tool:


You might achieve a cleaner cut with a retractable knife, cutting mat, and straight edge. But the scissors worked fine for me. Any rough edges left on the boards disappeared when I applied this finishing touch: tracing around the edges with an old black marker.
As you can see in the photo, spending those few seconds blacking the edges really makes a difference. The "before" tile looks like a picture glued to a mounting board. The "after" one looks like a professional board game.
That's all there is to it. An hour or two is all you need, and it will help you get years worth of gaming from your new HOFFT tile sets.
Cheers,
Chris
Awesome tutorial Chris! I just posted on it on my blog.
ReplyDeleteIf anyone wants to see HOFT over on the 15mm.co.uk website then paste the link below.
http://www.15mm.co.uk/HOF_Fire_Team_Game.htm
You can see the book and all the tiles there along with the unique Dropship Horizon bundle offer!
Gavin Syme
www.gavinsyme.co.uk